Gerir os cookies que são utilizados para publicidade, como a personalização de anúncios, o remarketing e a análise de desempenho de anúncios.
4.3.5.2. Set up The Bat! mail client
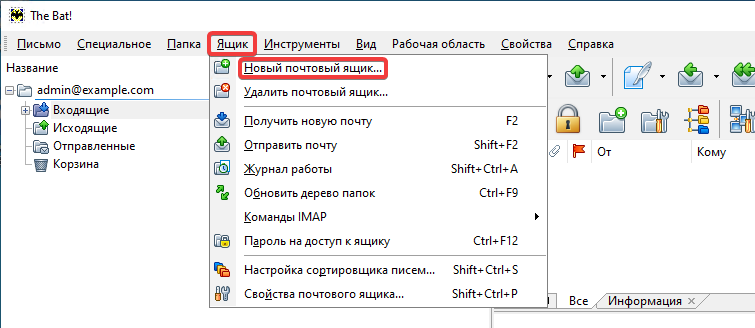
- In the top menu, click "Mailbox → New mailbox":
- Fill in the fields and click "Next":
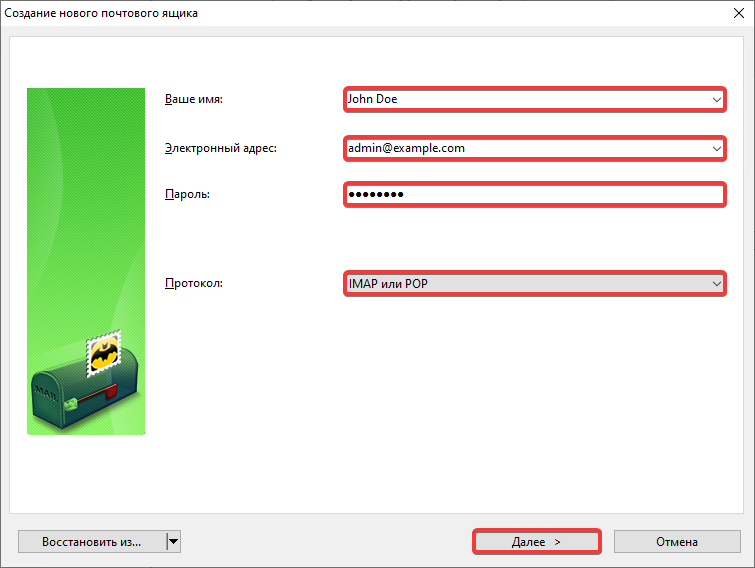
- "Your name" — your name in any format.
- "Email address — mailbox name.
- "Password" — mailbox password.
- "Protocol" — "IMAP or POP".
- Specify incoming email settings and click "Next":
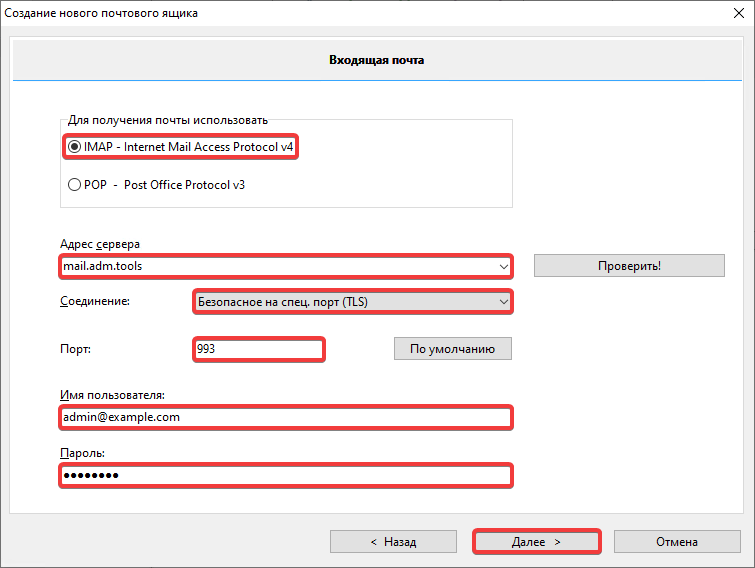
- "Use to receive email" — "IMAP - Internet Mail Access Protocol v4".
- "Server address" —
mail.adm.tools. - "Connection" — "Secure on special port (TLS)".
- "Port" —
993. - "Username" — mailbox name.
- "Password" — mailbox password.
- Specify outgoing mail settings and click "Next":
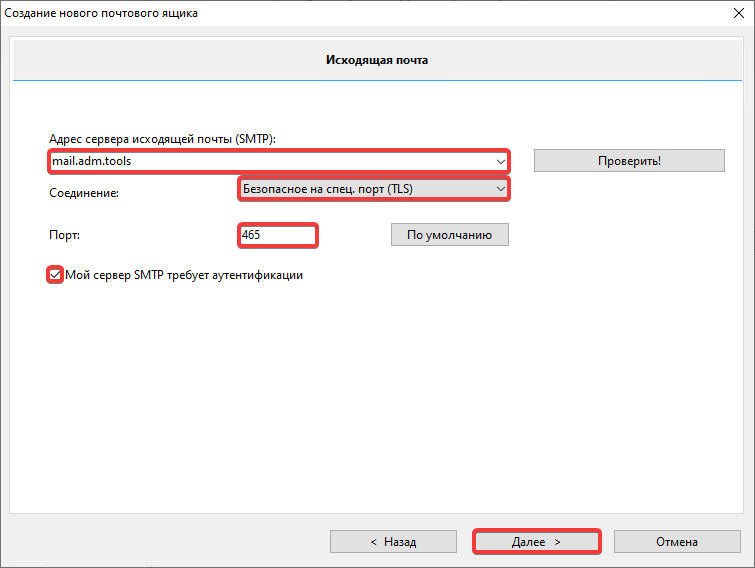
- "Outgoing mail server address (SMTP)" —
mail.adm.tools. - "Connection" — "Secure on special port (TLS)".
- "Port" —
465. - "My SMTP server requires authentication" — enable.
- Specify account information in The Bat! and click "Готово":
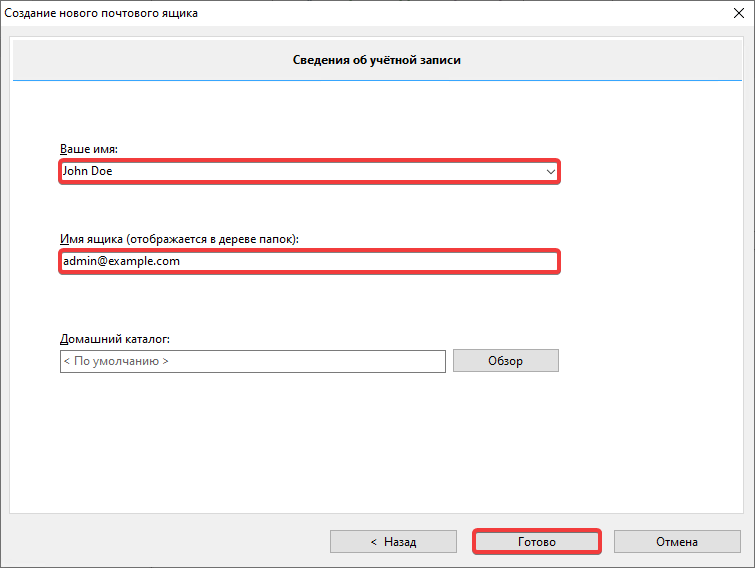
- "Your name" — your name in any format.
- "Mailbox name (displayed in folder tree)" — mailbox name.
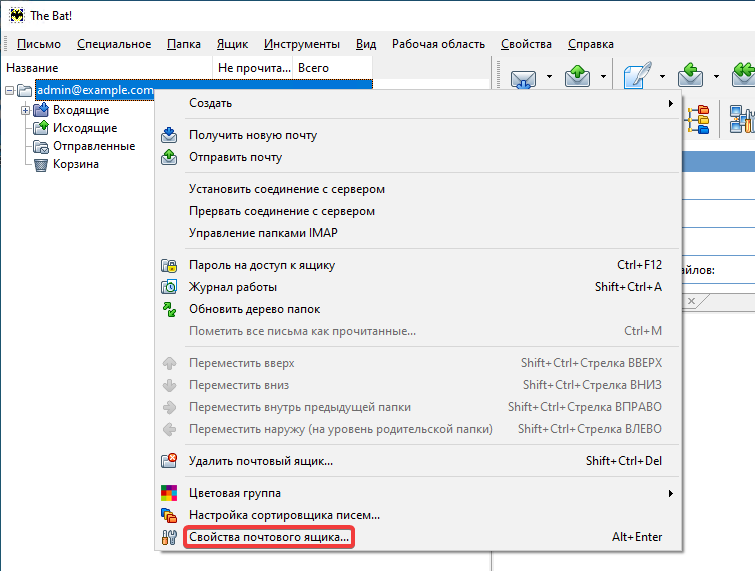
- Right-click the added mailbox in the main window and select "Mailbox properties…":
- Fill in fields in "Mail management" section and click "OK":
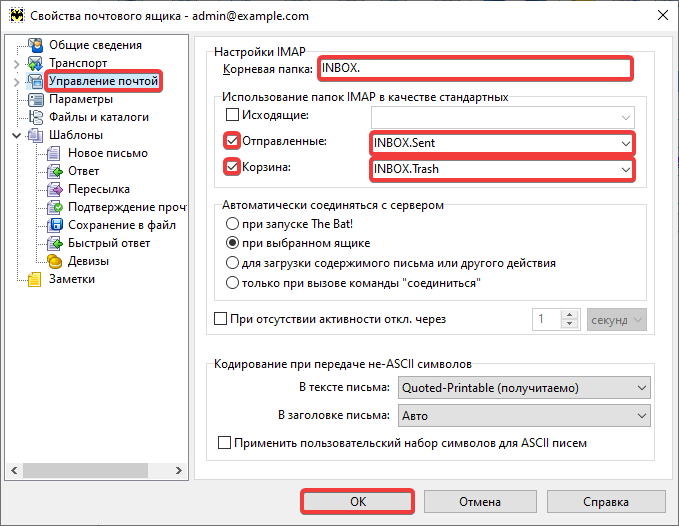
- "Root folder" —
INBOX.(with a dot). - "Sent" — enable and select "INBOX.Sent".
- "Trash" — enable and select "INBOX.Trash".
- Check the mail operation.